
Key Highlights
- Kali Linux is made just for penetration testing and comes packed with over 600 tools right from the start.
- By setting up Kali Linux as a virtual machine inside VirtualBox, you get to keep things safe and can easily go back if something goes wrong during security tests.
- With VirtualBox, you have the option to set up a virtual hard disk and tweak VM settings so that Kali Linux runs smoothly.
- Since Kali Linux updates on its own all the time, it makes sure you always have access to the newest tools and fixes for any security issues.
- When installing, it uses something called GRUB bootloader which lets you run it alongside other operating systems without any trouble.
- If you want a fast way to dive into using Kaili linux , grabbing a pre-made VM image for use in VirtualBox is super handy.
The Ultimate Guide: Install Kali Linux on Virtual Box
Kali Linux is an operating system that’s really good for people who test security systems and do ethical hacking. It comes with more than 600 tools already set up to help these professionals check if their computer systems are secure. Instead of putting it directly onto a computer, which we call installing on bare metal, you can run Kali Linux inside VirtualBox as a virtual machine, also known as a Kali VM. This has some benefits. I’m going to show you step by step how to get Kali Linux set up on VirtualBox, starting from downloading what you need all the way to tweaking the settings of your virtual machine.
Understanding Kali Linux and VirtualBox
Kali Linux is an operating system built on Debian, made especially for penetration testing and ethical hacking. It’s packed with tools that help security experts check how safe their systems are. On the flip side, VirtualBox is a kind of software called a type 2 hypervisor. This means it lets you use more than one operating system at the same time on your main OS, including the Windows Subsystem for Linux (WSL). When you run Kali Linux as a virtual machine inside VirtualBox, it keeps this hacker-friendly OS separate from your primary one. This setup makes managing and controlling everything in this virtual space, including access to the Kali toolset through the WSL framework, pretty straightforward.
Overview of Kali Linux
Kali Linux is a big hit with security experts because it comes packed with lots of tools for penetration testing right from the start. It’s built on Debian and gets updates all the time, which keeps it fresh – this is what they call a rolling distribution. With Kali Linux, you’re always up to speed with the newest stuff and safety fixes. This operating system uses a command-line interface that lets users punch in powerful commands and run scripts for different penetration testing tasks. Thanks to its wide range of tools and strong community support, Kali Linux stands out as the top pick for both security pros and ethical hackers, with the added benefit of customization options through metapackages and a well-documented ISO customization process.
Benefits of Using VirtualBox for Kali Linux
Using VirtualBox to run Kali Linux as a virtual machine comes with its perks. For starters, it keeps things safe by separating Kali Linux from your main operating system. This way, if anything goes wrong in Kali, your primary OS stays unaffected. With VirtualBox, you can also take snapshots of your VM which is super handy for going back to an earlier setup if something messes up during penetration testing. Additionally, by excluding the folder where the Kali VM is running from your antivirus program, you can prevent it from flagging the Kali VM as malicious, ensuring a smooth and secure experience.
Since VirtualBox works on Windows, macOS, and Linux too, it doesn’t matter what kind of computer you’re using; you can still get Kali Linux up and running without any trouble. It’s great at managing how much memory and processing power the virtual machine gets so that using Kali won’t slow down the rest of your computer.
And when it comes to saving money? Well, VirtualBox is totally free! That makes it a more wallet-friendly option than setting up kali Linux on bare metal or shelling out cash for VMware Workstation just to dive into some serious security work.
Preparing Your System for Installation
Before you get started with putting Kali Linux onto VirtualBox, make sure your computer has what it takes. You’re going to need enough RAM and storage space so that the virtual machine can run smoothly. On top of that, grabbing the Kali Linux ISO file is a must since it’s packed with all you need for the install. Lastly, setting up a virtual hard disk within VirtualBox is crucial; this is where your operating system and all things related to Kali will live. It is important to follow the proper installation procedure to ensure a successful installation.
System Requirements for Kali Linux on VirtualBox
To get Kali Linux up and running on VirtualBox, your host machine needs to check off a few boxes in terms of system requirements:
- Starting with RAM, you’ll need at least 2GB. That’s the bare minimum for Kali Linux to operate without hiccups. But if you’ve got more RAM to spare, it’s wise to use it for better performance.
- On the topic of hard disk space, make sure there’s at least 25GB available. This space is necessary not just for the operating system itself but also for all the tools and extra files you might want to add later.
- When it comes down to processors, Kali Linux plays nice with both types – whether your processor is 32-bit or 64-bit doesn’t matter as long as it’s compatible.
- With CPU cores, even though Kali can technically run on just one core; giving it access to more will certainly boost its ability especially when dealing with tasks that require a lot of computing power.
Downloading the Necessary Files
To get Kali Linux up and running on VirtualBox, first off, you’ve got to grab the ISO file of Kali Linux. This file packs everything—the whole operating system along with all the files needed for installation. Head over to the official website of Kali Linux to download it. Make sure you pick the right version (32-bit or 64-bit) that matches your host machine’s architecture. With the ISO downloaded, you’re all set to move forward with setting it up in VirtualBox. Now, it’s time to move on to the next step and download the necessary installer files for VirtualBox.
Creating a New Virtual Machine in VirtualBox
To get Kali Linux up and running on VirtualBox, you first have to set up a new virtual machine. This step includes setting up the virtual hard disk and tweaking other VM settings so that everything works well with Kali Linux. By making a new virtual machine, you’re able to give it just the right amount of memory and CPU cores that Kali needs. Plus, you can adjust various settings according to what you prefer on the next screen.
Step-by-Step Guide to Creating a VM
To set up a new virtual machine in VirtualBox for Kali Linux, here’s what you need to do:
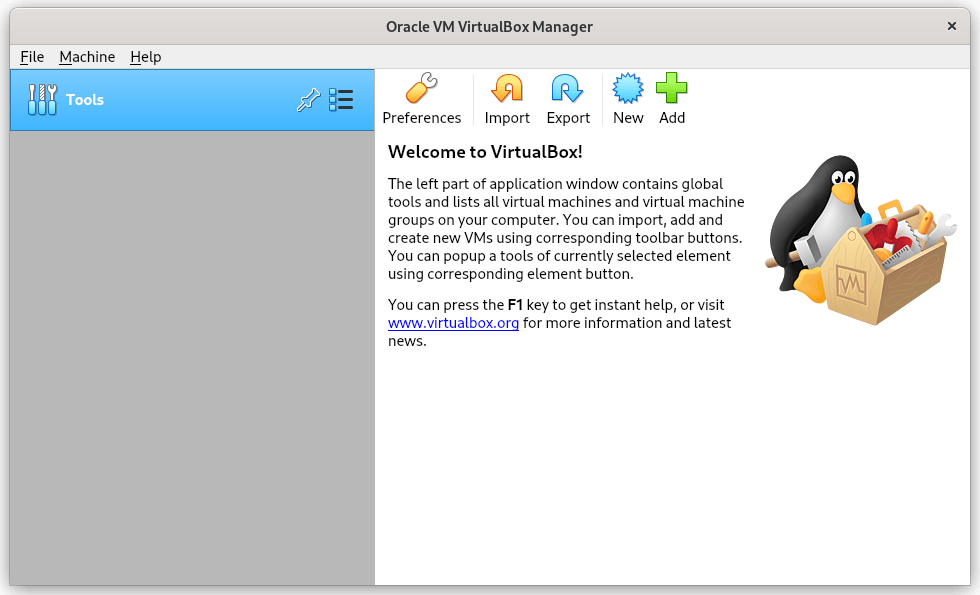
- Start by opening the VirtualBox Manager on your computer.
- With a click on the “New” icon, begin the setup process for your VM.
- When naming your VM, choose “Linux” as the operating system type and pick “Debian (64-bit)” for its version.
- For smooth running, it’s wise to give at least 2GB of memory (RAM) to your VM.
- Next step is making a virtual hard disk. Decide how big it should be and where you want to save it.
- After that, adjust extra settings like network options and display preferences according to what you need.
- Take one last look at all settings then hit the “Create” button so your VM comes into existence.
- -With everything done right, you’ll see your new VM listed in VirtualBox Manager; now it’s ready for Kali Linux installation.
Configuring VM Settings for Optimal Performance
To get Kali Linux running smoothly in VirtualBox, it’s crucial to tweak the VM settings just right. Here’s what you need to focus on:
- For memory (RAM), start with at least 2GB. If you’ve got more to spare, even better; it’ll make things run smoother.
- When setting up the virtual hard disk, go for no less than 25GB. This space is needed not just for installing Kali but also for any extra tools you might add later.
- With processors, look at what your host OS and machine can handle and allocate CPU cores accordingly.
- On the display front, adjust things like screen resolution and how much graphics memory is used based on what works best for you.
- Lastly, when it comes to network settings tailor them as per your needs. Turning on bridged networking often helps in making sure Kali connects well with your main operating system.
By paying attention to these areas—memory allocation using RAM; creating a sufficient virtual hard disk; wisely allocating processor resources; fine-tuning display preferences including screen resolution and graphics usage; along with configuring network options—you’ll set yourself up nicely for a good experience using Kali Linux within VirtualBox.
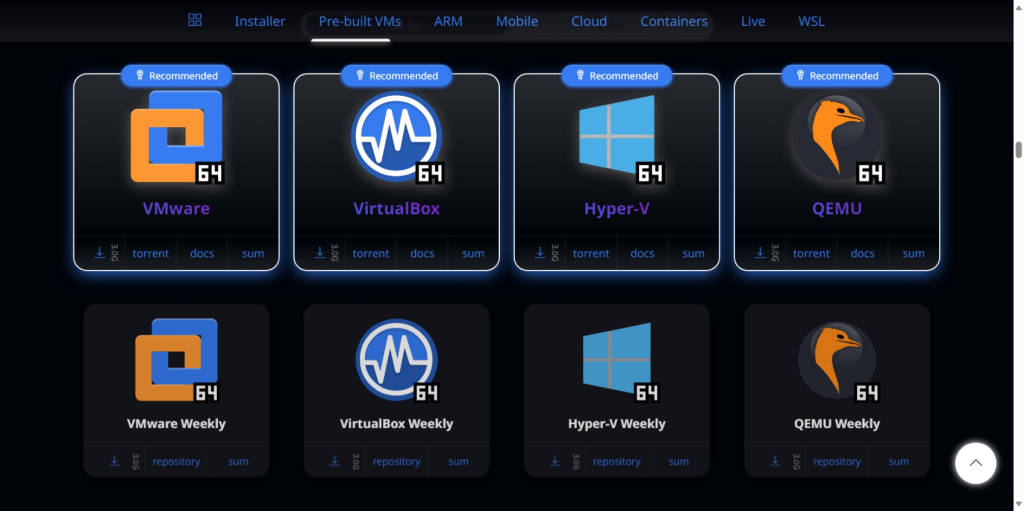
Installing Kali Linux Using the Pre-made VM Image
For those who like things fast and easy, installing Kali Linux on VirtualBox can be a breeze with a pre-made VM image. With this approach, you skip the hassle because everything’s already set up for you – from settings to tools. To get started with Kali Linux using one of these images, all you have to do is import it into VirtualBox and then do a bit of initial setup and configuration. This method also allows for direct access to hardware without any overhead, giving you complete control over the hardware access for optimal performance.
Importing the VM Image into VirtualBox
To get Kali Linux up and running in VirtualBox, here’s what you need to do:
- Head over to the official Kali Linux website and download the VM image made just for this.
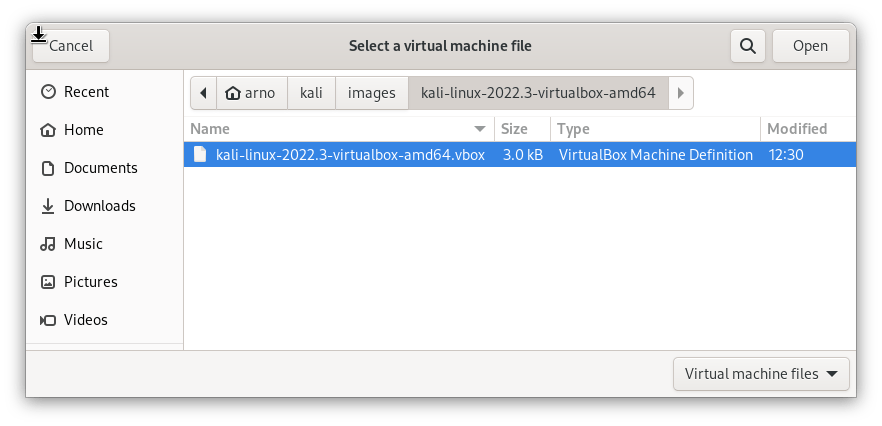
- With VirtualBox open, look for an “Import” button and give it a click.
- Now find that file you just downloaded, select it, then hit “Open.”
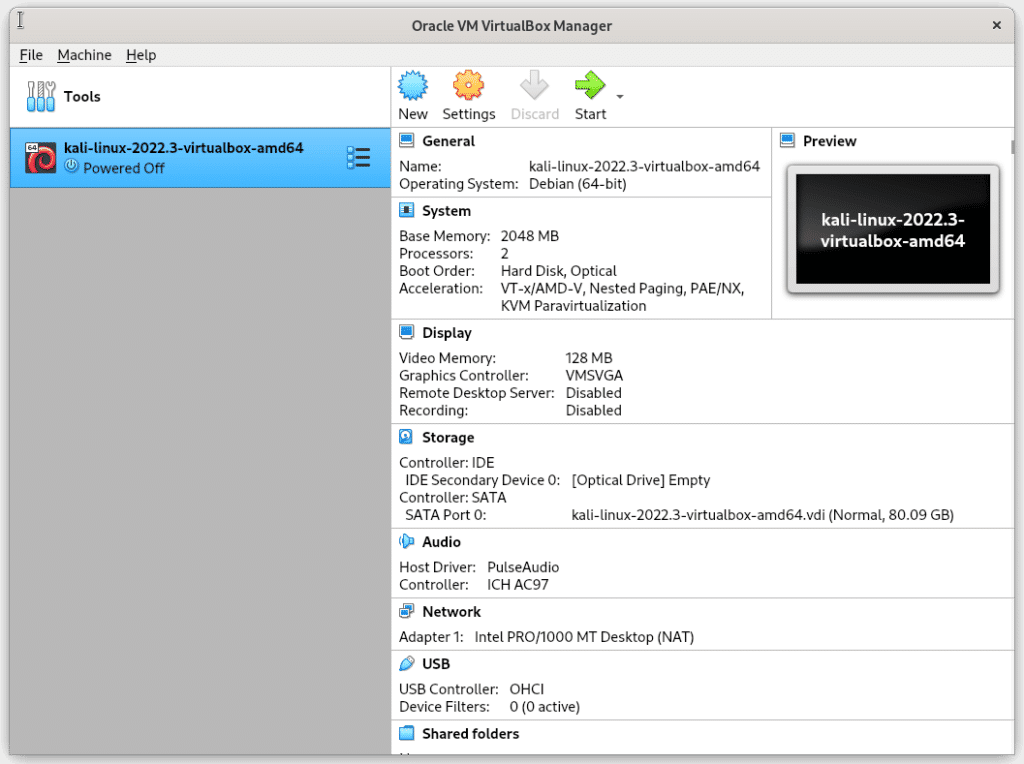
- Before going further, take a moment to check out the settings like its name, how much memory it gets to use, and where its virtual hard disk is.
- Hit “Import” again once you’re ready. This will kick off the setup of your new Kali Linux VM.
- After everything’s done loading up into Virtualbox Manager; there’s your fresh install of kali linux!
- -On finding your newly imported VM on the list? Click “Start” on it. You’re now diving into all that kali has to offer.
Once you’ve loaded the Kali Linux VM image into VirtualBox, there are a few setup tasks to tackle. With setting up your user account at the forefront, you’ll also need to pick the right time zone and create a strong password. Then comes tweaking the desktop environment to your liking. By going through these steps, you’re all set with a Kali Linux system that’s perfect for penetration testing and ethical hacking adventures.
Initial Setup and Configuration
Once you’ve loaded the Kali Linux VM image into VirtualBox, there are a few setup tasks to tackle. With setting up your user account at the forefront, you’ll also need to pick the right time zone and create a strong password. Then comes tweaking the desktop environment to your liking. By going through these steps, you’re all set with a Kali Linux system that’s perfect for penetration testing and ethical hacking adventures.
First Steps After Installation
After you’ve got Kali Linux up and running in VirtualBox, there’s a handful of things you should do next:
- Start by setting up the GRUB bootloader. This lets you choose to boot into other operating systems if that’s something you want.
- With the repositories set right, it makes sure all the newest tools and updates are just a click away.
- Don’t forget to update your system. It helps patch any security holes with available fixes.
- Make Kali Linux feel like home by tweaking it according to what works best for you and how you work.
- Now comes the fun part: dive into all those preinstalled tools and kick off your journey into penetration testing.
Updating Kali Linux to the Latest Version
With Kali Linux, you’re getting a big plus because it uses what’s called a rolling distribution model. This just means that instead of waiting around for brand new versions to come out, Kali Linux is always being updated with the latest security fixes and updates. To make sure your version of Kali stays fresh, you’ve got to keep on top of these updates.
Updating your system in Kali isn’t hard at all. You’ll be using something known as the command line along with the apt package manager to get things done. Starting off, you need to refresh your list of software packages by running:
sudo apt update

By doing this step first, you’re making sure that when it comes time to upgrade everything installed on your computer; it knows exactly where each piece needs updating from thanks to refreshed repositories information.
After those repositories are up-to-date, move onto upgrading every package installed by typing in:
sudo apt upgrade

This will bring everything up speed – ensuring that not only do you have the newest features but also important security patches too. It’s pretty crucial stuff if keeping kali linux safe and efficient matters!
Installing Additional Tools and Software
Kali Linux already comes packed with lots of tools for penetration testing, but sometimes you might need to add a few more based on what you’re working on. With Kali Linux, there’s an App Store that makes this really easy. This store has tons of stuff related to cybersecurity and penetration testing, including a mobile penetration testing platform for Android devices called Kali NetHunter. This platform is based on Kali Linux and consists of a NetHunter App, App Store, Kali Container, and KeX, making it a convenient option for on-the-go penetration testing.
To get new tools, just open up the App Store from your Kali Linux virtual machine. You can look around in different categories or use the search bar if you know exactly what you’re looking for. When you spot something useful, click on it to see more about it and hit “Install” if you want to add it.
The cool part is that the App Store takes care of setting everything up for these new tools automatically. So adding extra capabilities to your setup doesn’t have to be complicated at all.
Configuring Network Settings
When you’re getting Kali Linux ready on VirtualBox, making sure it can talk to the internet and the computer it’s running on is key. This means setting up how it connects to networks.
For this setup, you’ll work with network interfaces in VirtualBox. These are basically rules that tell your virtual machine the best way to connect with other computers and the internet. You’ve got a few choices like NAT, Bridged, or Host-only based on what you need.
With Bridged mode, your virtual machine gets direct access to the network as if it were just another device connected at home or work. NAT mode lets your virtual machine use the same connection as your host computer does for its internet needs without directly connecting to external networks. And then there’s Host-only mode which sets up a private conversation between your main computer and Kali Linux running inside VirtualBox.
Setting Up Network Interfaces
To get your Kali Linux virtual machine working right in VirtualBox, it’s super important to set up the network interfaces correctly. These interfaces are what let your virtual machine talk to the internet and other computers.
First off, open up VirtualBox Manager and click on your Kali Linux virtual machine. Then hit the Settings icon and head over to the Network tab. This is where you’ll adjust how your virtual machine connects with networks.
You’ve got a few choices for network modes like NAT, Bridged, or Host-only. With NAT mode, your virtual machine can use the same internet connection as your host computer does. If you pick Bridged mode instead, it’s like plugging directly into an actual network cable – giving direct access that way. And if you go for Host-only mode? That sets up a private chat line just between your host computer and the Kali Linux setup.
Ensuring Connectivity with Host Machine
To make sure your Kali Linux virtual machine talks to the host machine, it’s really important for sharing network stuff and getting online. You’ve got to set up the network bits right so they can chat with each other.
With VirtualBox, setting up these network parts lets your virtual machine borrow the host’s internet connection. It’s like making sure they’re on good speaking terms.
For keeping things smooth between your Kali Linux setup and the main computer, double-check those settings in VirtualBox are all correct. Pick either Bridged or NAT for how they’ll talk – this makes sure your virtual space can get out onto the internet through your actual computer.
Enhancing Security and Privacy
When you’re using Kali Linux for penetration testing, it’s really important to make sure everything is secure and private. To keep your Kali Linux virtual machine safe, there are a few things you can do.
For starters, changing the default passwords on your virtual machine is key. Using a strong password that mixes up big and small letters, numbers, and weird symbols makes it harder for others to break into your system.
On top of that, turning off any services or apps you don’t need for the tests you’re doing helps too. By doing this, there’s less chance someone can find a way in because there are fewer weak spots they could attack.
Changing Default Passwords
Switching up the passwords that came with your Kali Linux virtual machine is super important for keeping things secure. By picking a tough password for your account, you’re basically putting up a no-entry sign to keep out anyone who shouldn’t be there.
To swap out the old password in Kali Linux, just pop open the terminal and punch in:
sudo passwd
After this, it’ll ask you to type in the password you’ve been using so far before letting you set up a new one. When creating this new key to your digital door, mix it up with big and small letters, toss in some numbers and sprinkle some special characters on top.
On top of that, turning on rules for making sure all future passwords are complex enough is a smart move too. You can tweak these settings by diving into Kali Linux’s password policy options.
Disabling Unnecessary Services
Turning off services you don’t need on your Kali Linux virtual machine is a smart move to keep it safe. It helps make sure there are fewer ways for bad guys to get in.
When you first set up Kali Linux, it might turn on some things that you really don’t need for what you’re doing. These extra bits could be weak spots where hackers can sneak through.
To switch these unnecessary services off, either the command line or the graphical user interface will do the trick. With the command line, just use systemctl with disable and then add whatever service name comes next to shut it down.
It’s a good idea to go through which services are running every now and then and turn off those that aren’t helping with your work. Keeping everything up-to-date is also key in making sure your Kali Linux virtual machine stays secure.
Conclusion
In wrapping up, getting the hang of setting up Kali Linux on VirtualBox really opens doors for anyone into cybersecurity. By sticking to the steps we’ve laid out here, you’ll be able to get your virtual setup running smoothly in no time. It’s important to keep your system fresh with the latest version of Kali Linux, throw in some must-have tools, and beef up your security for a solid experience. Dive into using VirtualBox with Kali Linux and sharpen those cybersecurity skills of yours. If you’re keen on more tech tips and how-tos like this one, don’t forget to follow our platform so you can stay updated in this fast-paced digital world.
Frequently Asked Questions
How to Resolve Common Installation Issues
When you’re setting up Kali Linux on VirtualBox and run into some snags, there are a few basic steps to sort things out.
Start by making sure you’ve got the setup steps right and your computer meets what’s needed for it to work. Look over your VirtualBox settings again, paying attention to how much memory is given and that a virtual hard disk is in place.
If things still aren’t going smoothly, consider updating VirtualBox since the newest versions usually have fixes and better features. On top of that, diving into online forums where people chat about Kali Linux and VirtualBox could give you more tailored advice for any problems you’re facing.
What are the system requirements for installing Kali Linux on VirtualBox?
Before you get started with putting Kali Linux onto VirtualBox, it’s crucial to check that your computer has what it takes. You’ll need at least 2 GB of RAM, 25 GB of space free on your hard drive, and a version of VirtualBox that works well with everything else. With the host machine you’re using, make sure there’s enough spare capacity for the Kali Linux virtual machine because if there isn’t enough room or memory (RAM), things might not run as smoothly as they should.
Are there any specific settings or configurations that need to be adjusted in VirtualBox for optimal performance of Kali Linux?
To make Kali Linux run better on VirtualBox, there are a few tweaks you can do. These involve giving the virtual machine enough RAM and CPU cores, turning on hardware acceleration, and tweaking the display settings.
By going into your Kali Linux virtual machine’s settings in VirtualBox, you can change these options to boost its performance. It’s suggested to give it at least 2 GB of RAM and one CPU core for smoother running.
On top of that, turning on hardware acceleration and fine-tuning the display settings will help make Kali Linux work faster and more efficiently in VirtualBox.