
Key Highlights
- Wireshark is a handy tool that acts like a packet sniffer and network protocol analyzer, helping you catch, look over, and fix problems in network traffic.
- With it, you can check out network packets either as they happen or later on to figure out what’s wrong with your network.
- It’s popular among folks who manage networks, keep them safe, build software or just want to learn more about how things work online for fixing issues or gaining knowledge.
- The tool lets you grab packets of data moving through the network. You can sift through these bits of information and see everything laid out clearly which helps in understanding the flow of data across your system.
- Wireshark knows how to handle lots of different protocols and uses colors so you can easily spot various kinds of traffic at a glance.
- By tweaking its setup to suit your needs better. You get to use filters for focusing on specific details and check comprehensive stats that offer deep insights into what’s happening with your internet activity.
Introduction
Wireshark is like a super tool for anyone who needs to really get into the details of how networks talk to each other. It’s perfect for folks who manage networks, keep them safe, build stuff on them or just want to understand what’s going on when data moves from one place to another. With Wireshark, you can take a close look at network traffic and see everything in detail by using its features that let you sort through and zoom in on specific packets. Wireshark is a multi-platform software, meaning it can run on various operating systems such as Linux, Windows, OS X, FreeBSD, NetBSD, etc. It is a standard three-pane packet browser and performs deep inspection of hundreds of protocols. It also allows for live analysis from different types of networks, including Ethernet and loopback.
For those times when your internet is slow or something seems off with your connection, Wireshark helps figure out exactly what’s wrong. It lets you dive deep into network protocols so you can spot where things are getting stuck or messed up. You don’t have to be online either; it works just as well if you’re looking back at recorded data.
With an easy-to-use interface and support for loads of different ways computers communicate over networks, Wireshark is incredibly useful whether this kind of analysis is new territory for you or if it’s all familiar ground but still need powerful tools at hand.
By checking out every packet that zips through the network and analyzing past records too, insights about how things are running become clear which means making smart choices gets easier.
Understanding Wireshark and Its Capabilities
Wireshark acts like a detective tool for the internet, known as a network protocol analyzer and packet sniffer. With it, you can grab bits of data traveling across your network and take a close look at what’s inside them. As it listens in on network connections live, Wireshark catches whole flows of data moving back and forth. It then lets you sift through this information to find exactly what you need for offline analysis. By getting to know how different parts of the internet talk to each other with these tools, you can figure out where problems are happening in your network, spot any security weak spots, and really understand the flow of your network traffic.
The Evolution of Wireshark: From Ethereal to Today
Wireshark’s story began in the late 1990s, first known as Ethereal. It came to life as a free tool for analyzing network protocols, aiming to be better than the well-liked tcpdump by offering an easy-to-use graphical interface and the ability to look at network packets live.
By 2006, due to some trademark problems, Ethereal got its new name: Wireshark. From that point on, it kept getting better and is now seen as the go-to solution for checking out network traffic and capturing packets. With support for lots of protocols and file types like pcap, it works with many networking tools and gadgets. Nowadays, folks who manage networks use Wireshark a lot because it helps them figure out what’s happening with their networks. Wireshark has also received numerous industry awards, including eWeek, InfoWorld, and PC Magazine, solidifying its position as the top-rated packet sniffer in the Insecure.Org network security tools survey and earning the title of SourceForge Project of the Month in August 2010.
Core Functions: Packet Capturing and Network Analysis
At its heart, Wireshark does two big things: it grabs network packets and helps you understand what’s happening on your network. With this tool, grabbing or capturing those packets to look at later is a breeze. This means you can check out live stuff going through your network or take a closer look at packet captures when you’re offline.
With Wireshark, there are lots of ways to grab these packets. You’ve got something called capture filters that let you pick just the ones you want based on certain rules like what kind of protocol they use, where they’re coming from or heading to (think IP addresses), and which doors (or ports) they’re knocking on. By doing this, it makes sure only the bits relevant for your digging get caught in the net.
After snagging those packets, diving into them with Wireshark’s analysis tools is where things get really interesting. There are display filters that help zero in even further—like picking one conversation out of a noisy room full of chattering people—to focus solely on specific types or pieces of traffic. It lets you poke around inside each packet individually; peering into their details gives insights about different paths data takes across the web and helps spot any hiccups causing trouble in communications or understanding how all these digital bits flying back and forth paint a picture of your overall network activity.
Setting Up Wireshark for First-Time Users
Getting Wireshark set up for the first time is pretty easy and doesn’t confuse you. Before diving in, check that your computer has what it takes to run Wireshark. You’ll need an operating system that works with it, enough memory and disk space, and a network interface card (NIC) that’s compatible.
After making sure your system checks out, moving on to putting Wireshark on your computer is next. There are handy guides and instructions provided by Wireshark to make this step a breeze. Usually, you just download the installer from their site, open it up, then follow what it tells you on screen until everything’s installed. Once done with installing, opening up Wireshark lets you begin capturing and looking into network packets right away.
System Requirements and Compatibility
Before you go ahead and set up Wireshark, it’s key to make sure your computer is ready for it. This tool works with a bunch of different systems like Windows, macOS, and various versions of Linux. It also needs certain types of hardware to work properly, especially when we talk about network interface cards (NICs).
For those using Windows, Wireshark will run on Windows 7 through 10 as long as you have a 64-bit setup and at least 4 GB of RAM. On the macOS side of things, if you’re running version 10.12 (Sierra) or anything newer, you’re good to go. And for the Linux crowd? You can get Wireshark working on several flavors including Ubuntu, Fedora, and Kali Linux.
Beyond just having the right operating system in place, Wireshark has some specific asks when it comes to hardware too. It looks for a compatible NIC that can handle promiscuous mode – this is super important because it lets Wireshark grab all those network packets flying around. Some NICs might need an extra push with additional drivers or settings adjustments so they can do their job in promiscuous mode. To avoid any hiccups, it’s wise to dive into Wireshark’s’ own guides and documentation. They’ve got all the details you’ll need to check if your gear is up to task.
Step-by-Step Installation Process
Setting up Wireshark on a Windows computer is pretty easy and doesn’t take much effort. Here’s what you need to do:
- Head over to the official website (www.wireshark.org) and grab the installer.
- Open the installer once it’s downloaded, and just follow what it tells you on your screen.
- When it asks where to put Wireshark on your computer or if you want shortcuts, make those choices.
- It’ll then ask which parts of Wireshark you want installed – sticking with what’s already chosen for you (the default options) works fine for most people.
- Next, decide if you want extra things like an icon right there on your desktop or adding Wireshark so your computer knows where it is all the time.
- Hit “Install” when everything looks good to get started putting Wireshark onto your system.
After everything’s done installing, launching Wireshark can be as simple as clicking its new shortcut either from your desktop or in the start menu.
Depending on which version of Windows or even which release of Wireshark you’re working with might change things up a bit but not by much. If anything seems off, checking out their user guide should help clear any confusion.
Navigating the Wireshark Interface
The Wireshark interface makes it easy for anyone to catch and look into network packets. At the heart of Wireshark, you’ll find a few key parts that help you move through and work with the captured packets.
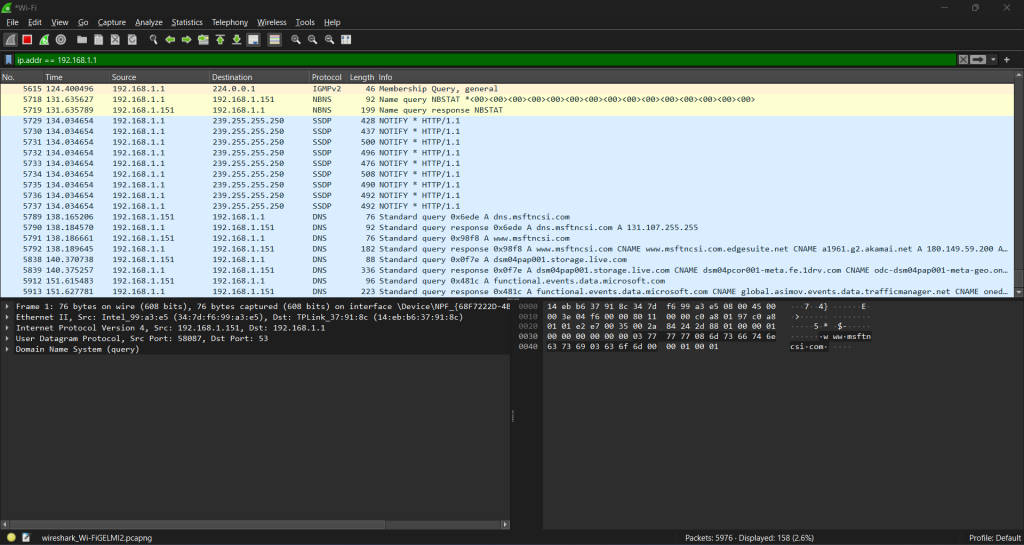
With different sections like the packet list, packet details, and packet bytes, navigating is straightforward. In the packet list section, you see all your caught packets lined up with essential info such as their number, when they were caught, where they’re from and heading to, what protocol they use, and how big they are. Moving on to the packet detail’s part gives you a closer look at each selected packet, diving deep into various protocol fields and what’s inside them. The packet bytes area shows off each packet in its raw hexadecimal form.
Wireshark doesn’t stop there; it also has menus along with toolbars and buttons that let you do more things like filtering out specific information or changing how everything looks so it suits your needs better. With its graphical user interface (GUI), navigating Wireshark is made even easier. You can even check out statistics or get down to some serious pack analysis tasks if needed.
Getting comfortable with using this interface will definitely make working within Wireshark smoother for handling those tricky network issues.
Overview of the Main Window Components
In Wireshark’s main window, you get to see everything about the packets that have been caught. It’s set up so you can really dig into what each packet is all about and figure out how they work.
- With the packet list, it shows a bunch of captured packets right in front of you. You’ll see things like which number each packet is, when it was caught, where it came from, where it’s going, what kind of protocol it uses, and its size. This part lets you scroll through all these packets and pick out just the ones you want to look at more closely.
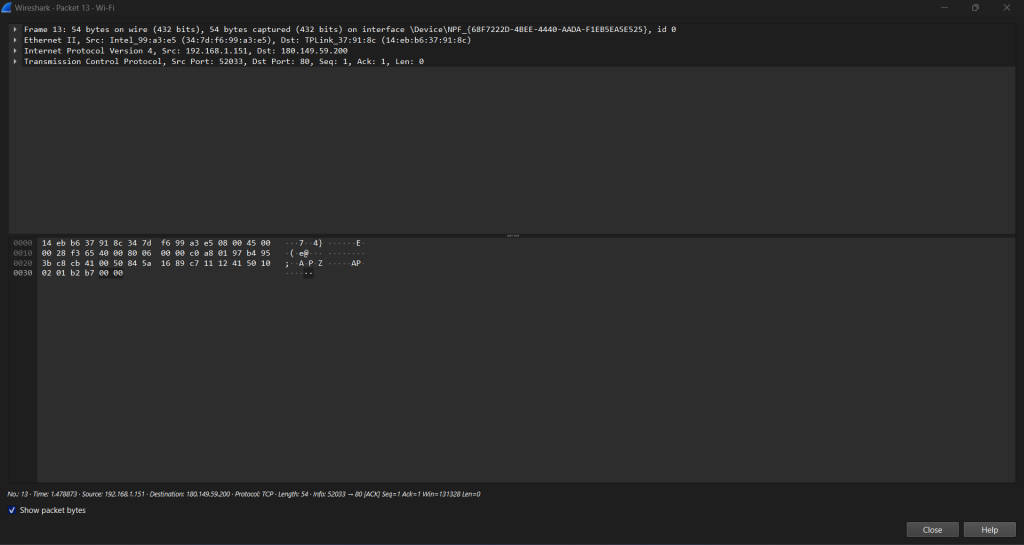
- Over in the packet details area, once you’ve picked a packet to look at; this spot gives you every little detail about that packet. We’re talking every bit of info on different protocol fields and their values so that nothing gets missed when checking them over.
- Then there’s the packet bytes section showing off exactly what makes up your chosen packet but in raw hexadecimal form. It translates those complex byte sequences into something anyone can understand if they take a closer look.
You’re not stuck with how everything looks from the start either; feel free to move stuff around or change sizes until it feels right for working on analyzing network packets better using Wireshark.
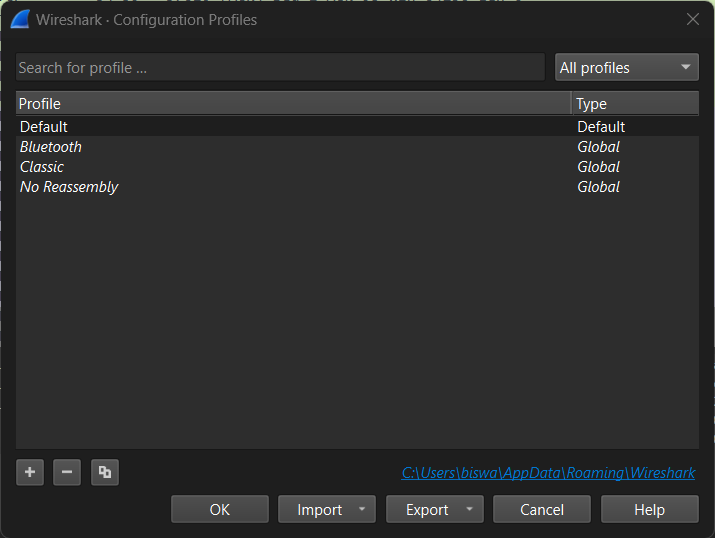
Customizing the Layout for Efficiency
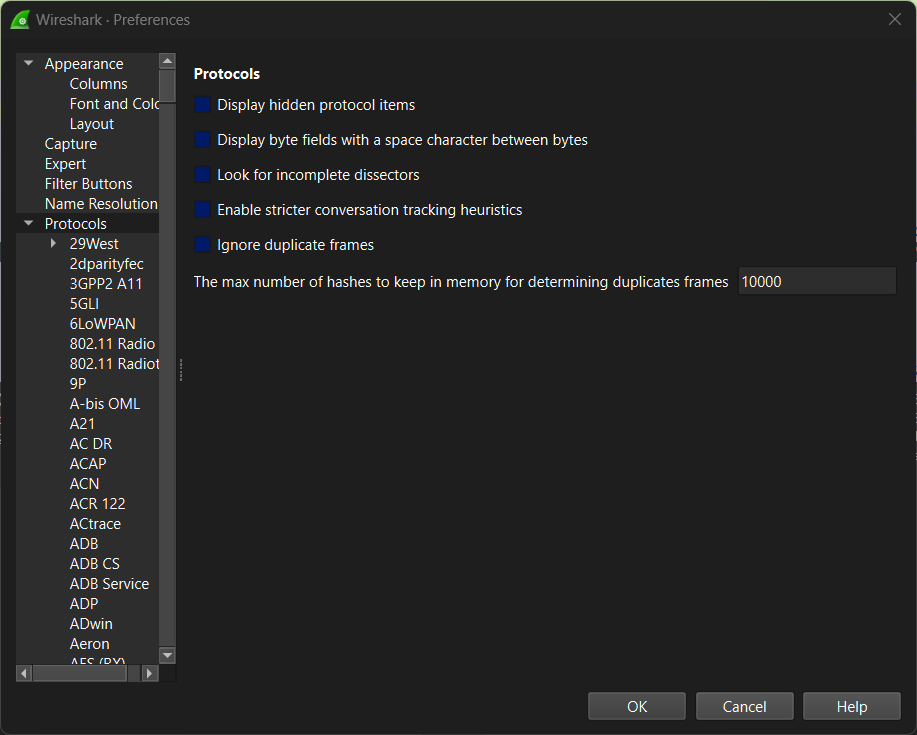
Wireshark lets you change how it looks so it works better for you. You can move things around, add or take away columns in the packet list, and show only the details that matter most for your work.
With a right-click on parts of Wireshark’s interface, like the packet list, you get to tweak things. This means adding or getting rid of columns, making them wider or narrower. Plus, you can switch up how Wireshark looks by messing with colors and text sizes.
By setting up Wireshark just right for what you need, your work gets easier because everything important is front and center. Making these changes helps use all that Wireshark offers more effectively.
Deep Dive into Packet Capturing
Using Wireshark to look into what’s happening on your network is pretty key, and it all starts with grabbing packets of data as they zip around. This can be done live or by checking out saved packet captures later to figure out the flow of network traffic.
With Wireshark, you get down into the nitty-gritty by having your computer’s interface card scoop up all sorts of packets from the network – not just those meant for you. By switching this card to a mode called promiscuous, it catches everything flying through the digital airwaves, including unicast traffic not sent to that network interface controller’s MAC address. This way, you’re not missing out on anything and get a full picture of what’s going across your network.
By diving into these captured packets, we can sift through the data looking for clues that help us fix issues or simply understand better how our network traffic moves about. It’s like being a detective but for internet stuff! Packet capturing isn’t just some fancy trick; it’s an essential part of keeping tabs on and analyzing activity within networks.
Initiating Your First Capture
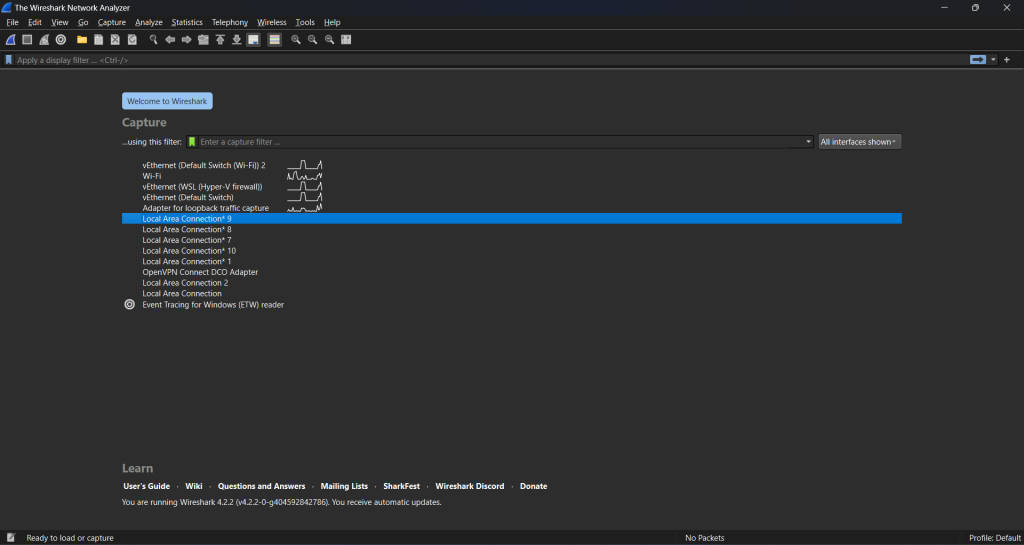
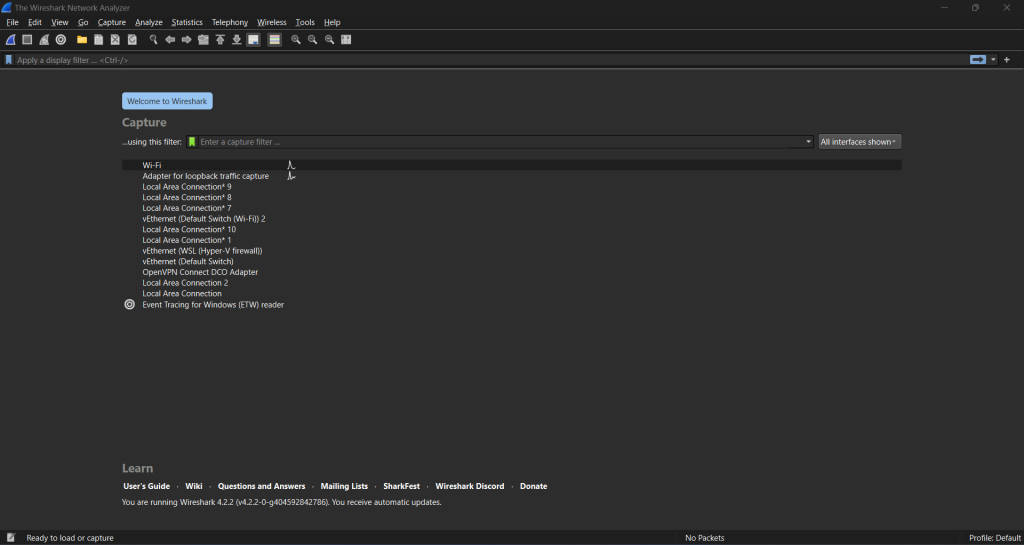
To start capturing data with Wireshark, first, you need to pick the right network interface card (NIC) and set up how you want to capture things. Here’s a simple way to get going:
- Open Wireshark and hit the “Capture” menu.
- Choose your NIC from all the ones you can use.
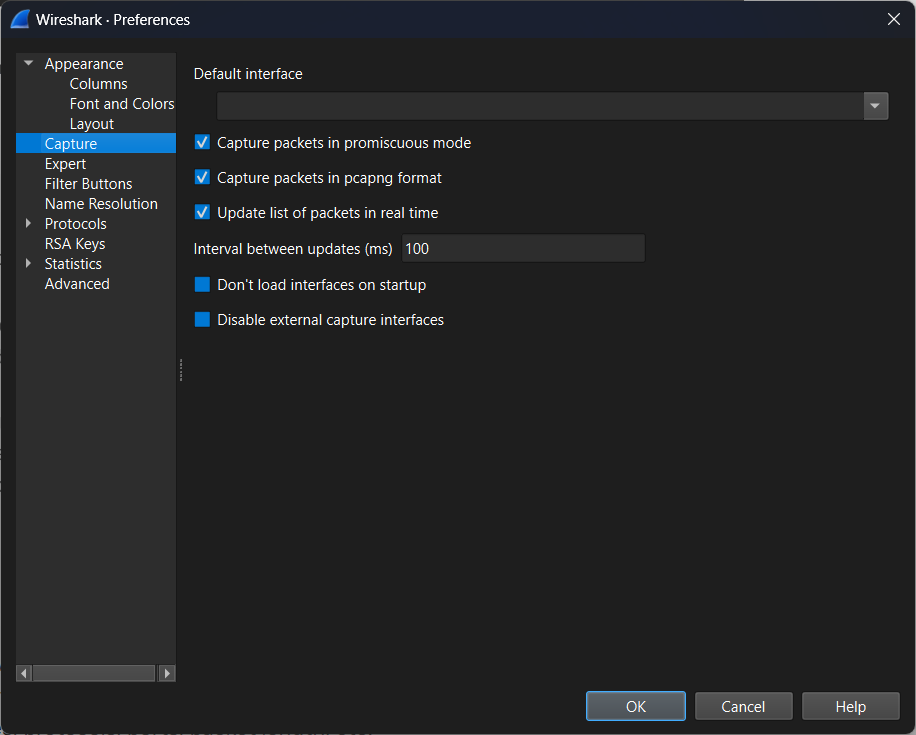
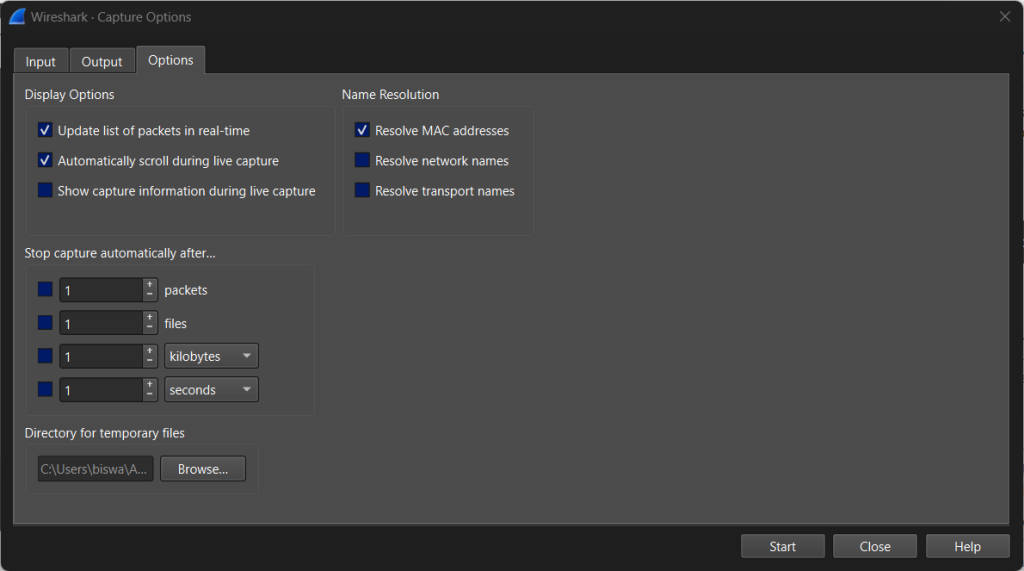
- Set up your capture settings like what kind of packets you’re looking for, how big the packet buffer should be, and whether or not to use promiscuous mode.
- Press “Start” to begin capturing.
With Wireshark, you have this cool feature where you can use capture filters so that it only grabs packets based on specific stuff like IP addresses or types of protocols which helps in focusing on just the information needed.
By doing this initial setup in Wireshark for captures, it lets us grab network packets as they happen live or save them so we can look at them later which is super helpful when trying to figure out what’s happening with our network traffic or sorting through any potential network issues.
Understanding NIC Promiscuous Mode
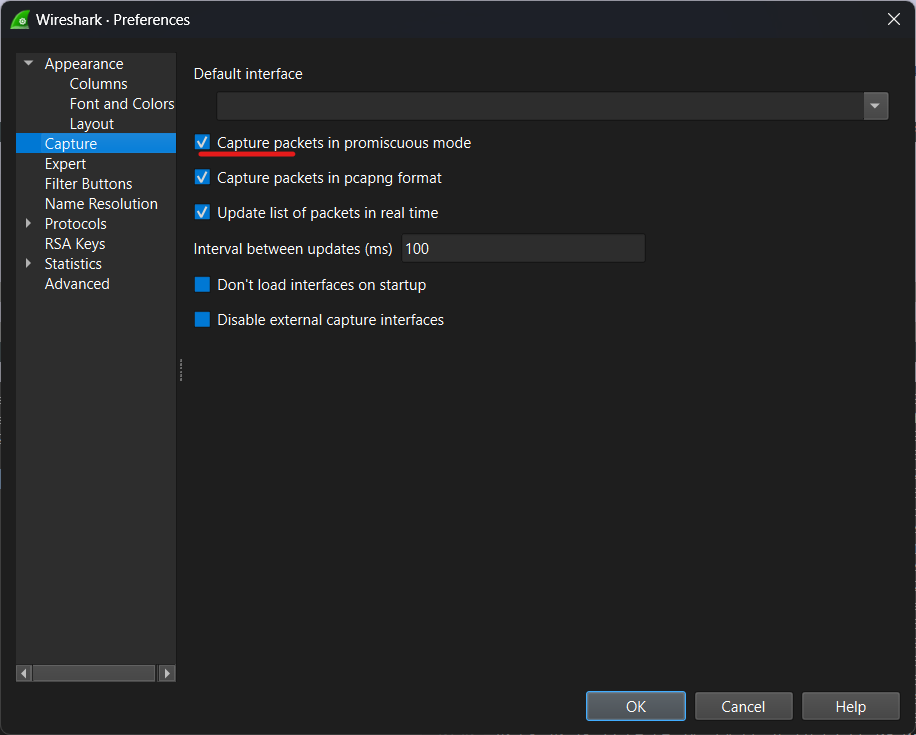
When a network interface card (NIC) is set to promiscuous mode, it grabs every bit of data passing by on the network segment it’s connected to. It doesn’t matter who the data was meant for; if it’s in range, the NIC scoops it up. This feature is super handy for tools like Wireshark that need to see all the traffic flowing through a network to analyze what’s happening.
By switching on promiscuous mode, Wireshark gets an all-access pass to every packet zipping around on that part of your network. This full view helps anyone using Wireshark get down into nitty-gritty details about how information moves in their setup.
Having NICs work this way opens doors for deep dives into your system’s communications. With everything laid bare before tools like Wireshark, pinpointing where things go wrong or spotting unusual patterns becomes much easier. Essentially, turning on promiscuous mode gives you x-ray glasses for looking at your digital info streams—perfect when you’re trying to figure out tricky issues with how devices are chatting over your wires and waves.
Mastering Filters in Wireshark
In Wireshark, filters are a handy tool that help you zoom in on the packet traffic you’re really interested in. There are two kinds of filters: capture filters and display filters.
With capture filters, before any packets get captured, you can set up rules to only grab those that meet certain conditions like where they’re coming from or heading to (think IP addresses), what kind of digital pathway they use (like port numbers), or the type of data language they speak (protocols). This way, you end up capturing just the stuff that matters to you, including USB traffic and wireless connections.
On flip side, display filters come into play after all the packets have been collected. They let you sift through everything, and pinpoint exactly which packets or types of communication catch your eye based on different criteria.
The way these filter work is by following a special recipe for writing out your filtering wishes – this includes using logical operators and patterns known as regular expressions. Getting good at using Wireshark’s filter syntax means being able to quickly find and troubleshoot issues within piles of packet data.
The Difference Between Capture Filters and Display Filters
In Wireshark, there are two handy tools called capture filters and display filters that help us look into network packets more closely. Even though both of them do the job of picking out certain packets, they work in different ways.
With capture filters, you pick out specific kinds of packets to save when you’re capturing them. You set up rules using a simple language that tells it what kind of information to look for—things like IP addresses, types of protocols used, or port numbers. This is super helpful if you only need certain bits for your analysis since it means less data to go through later on. Additionally, capture filters allow you to capture packets using a particular protocol, making it easier to analyze and troubleshoot issues related to that specific protocol.
On the flip side, after all those packets have been captured and saved, display filters come into play. They let you sift through that collected data with another set of rules so you can zero in on just the stuff that matches your criteria. Maybe you’re interested in where traffic is coming from or going to (like an IP address), what protocol is being used or which ports are involved; this tool makes finding those details easier by filtering everything else out. For a comprehensive reference of filter fields, check out the display filter reference at https://www.wireshark.org/docs/dfref/.
So basically: during packet collection time use capture filters if want only some pieces based on things like their ip address or protocol because it saves space and effort later; then once everything’s gathered up switch over display filter mode focus down even further anything might be particularly interesting about network traffic already caught.
Applying Basic and Advanced Filters for Targeted Analysis
Wireshark comes with a toolkit for filtering that ranges from simple to complex, making it easier to zoom in on specific network packets. With basic filters, you can sift through packets by looking at things like the IP address, what protocol they’re using, their port number, and more. It’s pretty straightforward – if you want to see only the HTTP traffic or just the packets heading towards a certain IP address, there’s an easy syntax for that. Additionally, advanced filters can be applied to target specific types of packets, such as http requests, which can be useful for troubleshooting or visualizing web traffic. This makes Wireshark a powerful tool for analyzing and understanding http requests and other types of network traffic.
On top of these basics are advanced filters. These let you set up more detailed conditions by combining multiple criteria with Boolean operators such as AND, OR, and NOT. So, if your goal is to track down all packets coming from one particular IP address while also sticking to a certain protocol and source port? You totally can.
By mixing and matching these basic and sophisticated tools Wireshark offers; pinpointing exactly which network traffic or packet data matters most becomes much simpler. This kind of focused analysis not only helps in understanding what’s happening on your network but also makes troubleshooting issues far less of a headache.
Analyzing Network Packets with Wireshark
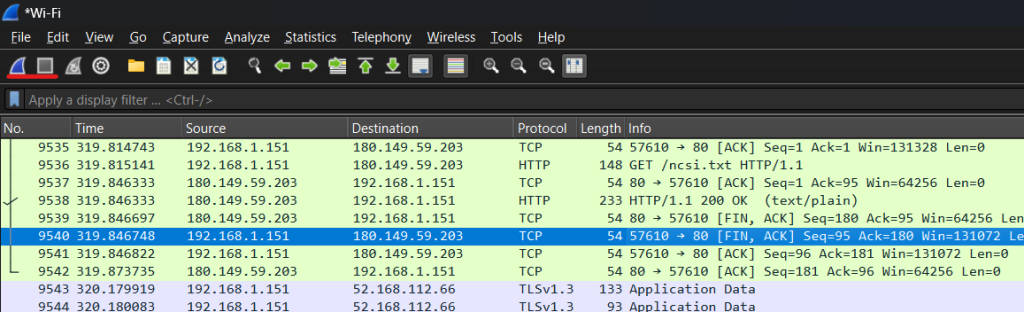
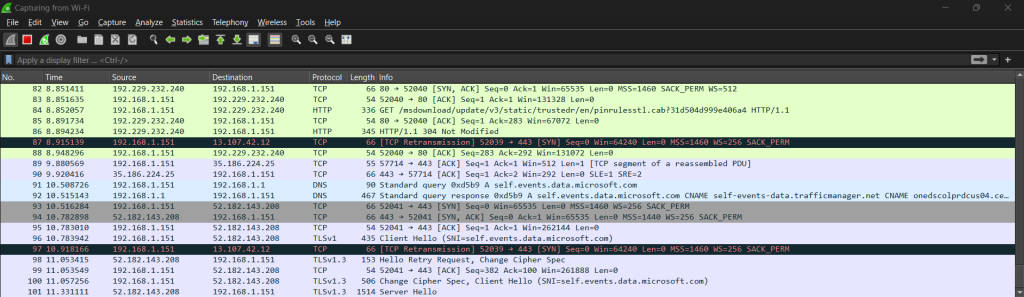
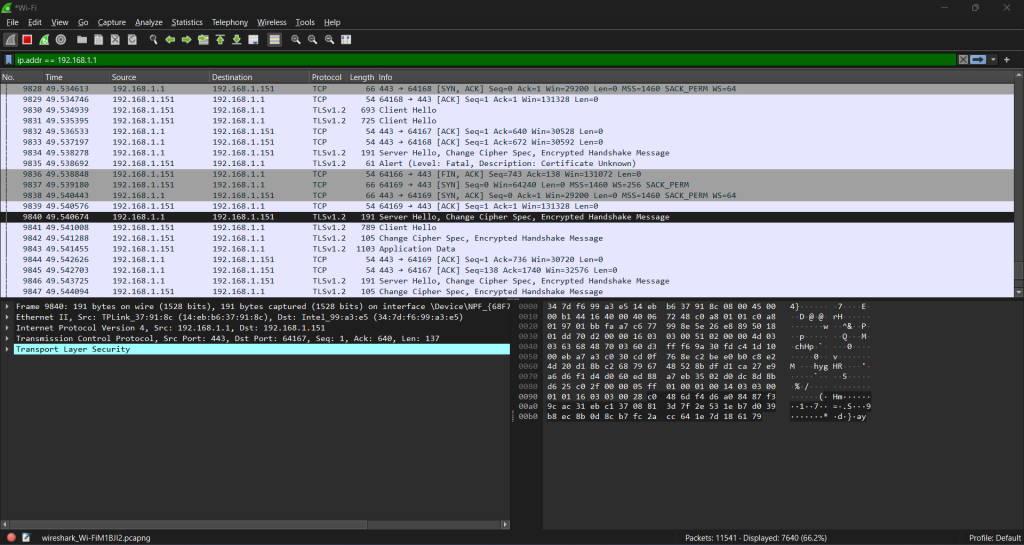
When you use Wireshark to look at network packets, it’s like getting a deep dive into what’s happening on your network. This tool shows you everything about each packet that goes through, including where it’s coming from and going to with IP addresses, the kind of data being sent in protocol fields, and all the technical bits in the header. What makes it even cooler is how it uses different colors for various types of packets based on their protocols, such as TCP, UDP, DHCP, and ICMP. This color coding helps you see what’s going on much easier. By checking out these details—like packet types and all their info—you can spot where problems might be hiding in your network traffic, figure out how data moves around, and really get down to why certain issues are popping up.
Breaking Down Packet Details
With Wireshark, you get a deep dive into each packet caught in the net of network traffic. By looking at what’s inside these packets, like where they’re coming from and going to with IP addresses, which doors they knock on using port numbers, and the kind of language they speak through protocol fields and header info, you really start to see how devices chat across the network. It’s like being able to listen in on their conversation; figuring out what protocols are being used, tracking the flow of messages back and forth, and seeing exactly what data is getting passed around. This peek under the hood lets you spot when something’s not quite right or if there’s a hiccup slowing things down. For folks who keep networks running smoothly or safe from troublemakers—like network administrators or security experts—this detailed look at packet details, including protocols like DHCP, that Wireshark offers is super handy for fixing problems or keeping an eye out for anything fishy.
Using Color Coding to Identify Packet Types
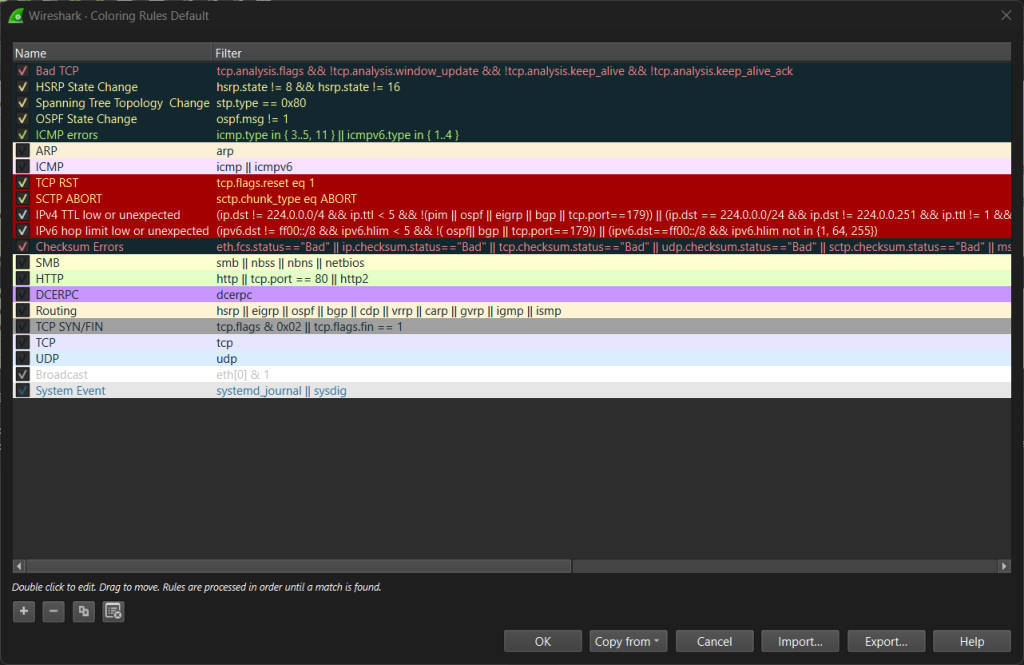
Wireshark makes it easier to look at network traffic by using different colors for different kinds of packets. With this method, each packet gets its own color depending on what protocol it uses. This means you can quickly see what kind of packet you’re looking at without having to dig too deep. For instance, TCP packets might show up in light purple, UDP ones in light blue, and HTTP packets stand out in light green. By doing this, figuring out which protocols are being used and understanding how data moves around becomes a lot simpler. When there’s something off or unusual happening with the network traffic, these colors help you spot problems faster so you can zoom in on certain types of packets or protocols that need closer inspection. Overall, Wireshark’s use of color coding really steps up its game when it comes to analyzing network packets effectively.
Troubleshooting Common Network Issues with Wireshark
Wireshark is a super handy tool when you’re trying to fix usual problems with your network. It lets you grab and look closely at the data packets moving around in your network, which helps figure out and sort issues like slow speeds, delays, or other hiccups that mess with how well your network works. By diving into these captured packets, you can spot where things are getting stuck or going wrong—like bottlenecks or spots where messages get mixed up—that might be making your network drag. With Wireshark giving you all the nitty-gritty details on each packet, it’s easier to find out what’s causing trouble and then do something about it. So if your internet feels sluggish, keeps lagging, or just isn’t reliable sometimes; Wireshark could really help shine a light on what’s going wrong so you can make things run smoothly again.
Identifying and Resolving Bandwidth Problems
One common problem with networks that you can spot and fix using Wireshark is when there’s not enough bandwidth. Think of bandwidth like a road; if it’s too narrow for the traffic, things will start to slow down. With Wireshark, you get to look at network packets – kind of like checking cars on the road – to see if they’re moving smoothly or getting jammed up because there isn’t enough room. By looking into how much data is being sent across the network and spotting any hold-ups or congestion, you figure out where the trouble spots are. After finding out what’s wrong, steps like tweaking how your network is set up, getting better equipment, or setting rules on which types of data should go first (that’s QoS) can help clear up these issues.
Diagnosing Latency and Connection Issues
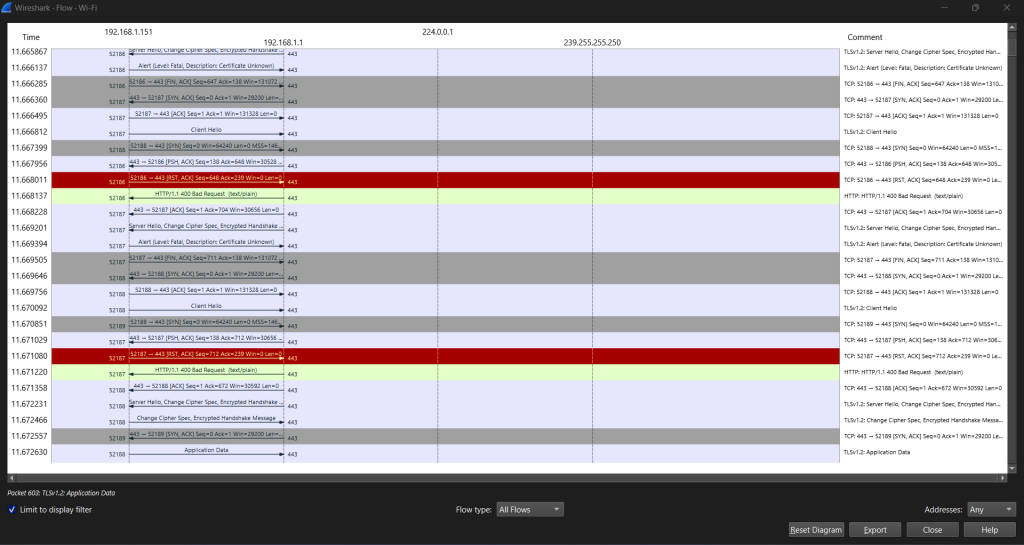
When you’re dealing with a slow network or when your connection keeps dropping, it’s really frustrating. That’s where Wireshark comes in handy. It helps figure out what’s going wrong by looking closely at the data being sent and received over the network – we call these “network packets” or “IP packets.” Specifically, it looks at TCP packets (a type of packet) to see how fast they’re moving and whether any are getting lost along the way.
Latency is just a fancy word for delay. So, if there’s latency, it means there’s some hold-up in the data getting from one device to another. And if you’re having connection issues, that could mean your internet goes out now and then or completely drops off.
By checking out these TCP packets and when exactly they were sent versus when they got where they’re going (their timestamps), Wireshark can tell us quite a bit about how good or bad our network performance is. This includes spotting delays in sending data around, noticing if any information gets lost on its journey (packet loss), or pinpointing other mistakes happening that mess up our browsing experience.
After figuring out what’s causing trouble – be it delays, dropped connections, or errors – those who take care of networks can start fixing things up. They might adjust settings to make everything run smoother; fix broken parts that keep messing up signals; or solve other deep-rooted problems making everyone’s online life harder than it should be.
Enhancing Network Security through Wireshark
Wireshark is like a super tool for keeping your network safe. It works by checking out and breaking down the bad stuff happening on your network. As a packet analyzer, it lets you grab and look closely at network packets. This means you can spot security risks and dodgy activities early on. For example, if someone’s trying to sneak into your system, sending out info they shouldn’t be, or scanning your network in weird ways, Wireshark will help you catch them in the act. On top of that, it’s great for doing check-ups on how strong your security is; letting you find any weak spots that need fixing up. With its knack for digging deep into what’s going across your network, Wireshark gives you the lowdown so you can keep things tight and secure against cyber baddies.
Detecting Malicious Activities and Vulnerabilities
Wireshark is a really handy tool when it comes to spotting bad stuff happening on your network. By grabbing and checking out network packets, you get to see if there are any security risks or weak spots hanging around in your system. With Wireshark, you can catch onto weird patterns that might mean someone’s trying to sneak into your network, scanning it for info, or sneaking data out, including sensitive information such as passwords. It’s also great for finding holes in how your network talks to itself or is set up which could let attackers slip through the cracks. Looking at these captured packets gives you a clear picture of how safe your network is and what steps you need to take next to keep things tight and secure. So basically, Wireshark helps big time with keeping an eye out for dangers early on and making sure your network’s defense game is strong.
Implementing Effective Packet Analysis for Security Audits
Wireshark is a key tool when you’re looking into the security of your network and trying to figure out what’s happening with the data moving through it. Think of it as a detective for your internet, where its job is to grab and look closely at network packets. This helps spot any weak spots or issues that could let hackers in. With Wireshark, you get all the nitty-gritty details like what kind of information is being sent, who’s sending it, and where it’s going. By checking out these details using Wireshark, you can catch anything odd or anyone trying to sneak into your system without permission. All this digging gives you a heads-up on where your defenses might be thin so you can beef them up before trouble starts knocking on your door. So basically, by getting good at analyzing packets with Wireshark, not only do you keep an eye on everything flowing in and out of your network but also make sure all your important info stays safe.
Conclusion
Getting the hang of Wireshark is key for anyone looking into network analysis and security. It’s all about getting to know how it has grown, what it does best, and its knack for digging deep into packet data which helps in fixing network problems. With a good grip on filters and knowing your way around its interface, you can spot bandwidth hiccups, figure out why there’s lag, and beef up your network’s safety by really understanding those packets. Wireshark comes packed with features that are gold for folks working on networks. If you’re aiming to get better at using Wireshark or want more smart tips, make sure not to skip subscribing for some top-notch advice straight from the experts.
Frequently Asked Questions
What is Wireshark and how is it used in network analysis?
Wireshark is like a super tool for checking out what’s happening on the internet highway. It grabs and breaks down those tiny bits of data zooming around, so you can see where they’re going and where they’ve come from. With this info, folks use it to figure out problems with their internet, keep an eye out for sneaky stuff, or just make sure everything’s running smoothly. By looking into these details about network traffic and data packets, Wireshark helps in spotting any hiccups or unwanted guests trying to mess with your connection.
What are the main features of Wireshark?
Wireshark’s main features include live packet capture, deep inspection of hundreds of protocols, decryption support for many protocols, and powerful display filters to focus on the information important to you. Its rich feature set makes it a top choice for network troubleshooting and analysis.
What are some common types of network issues that can be identified using Wireshark?
Wireshark is a handy tool for spotting various network issues like problems with bandwidth, delays, troubles connecting, and losing packets. By grabbing and looking closely at network packets, it sheds light on how the network is doing. It points out where things are getting jammed up or slow and assists in figuring out what’s messing with the flow of data across the network.
How can I filter and analyze data captured by Wireshark effectively?
When you’re working with Wireshark to sift through and make sense of the data it grabs, there are two handy tools at your disposal: capture filters and display filters. With display filters, you can narrow down the packets you see based on things like IP addresses, what kind of protocols they use, which ports they come in on, and more. On the flip side, capture filters help you pick out just a certain group of packets that you want to keep an eye on right from the start. By using these two types of filters together along with Wireshark’s powerful features for digging deep into data, you can really focus in on specific bits of network traffic that matter most and uncover some useful info about how things are flowing across your network.